

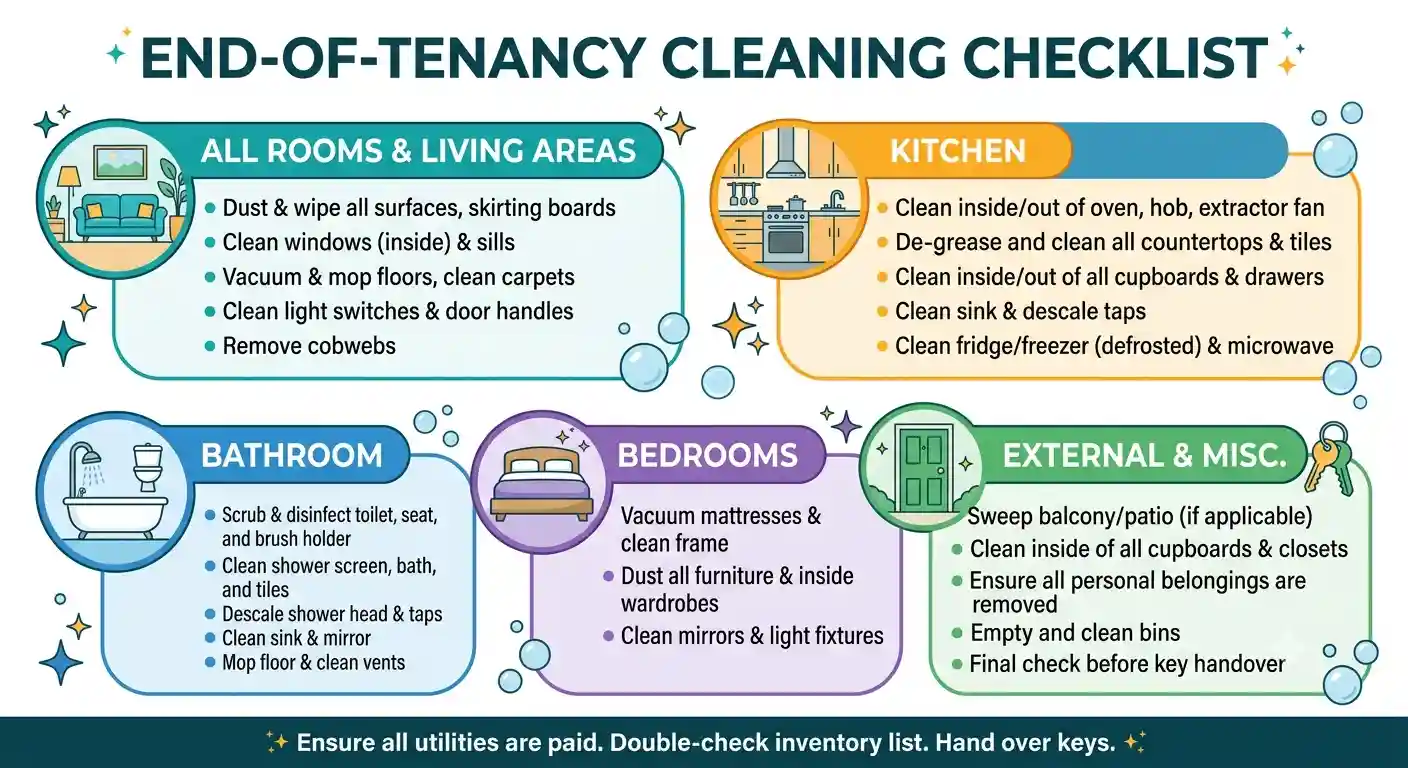
End of tenancy cleaning checklist: room-by-room guide
An end of tenancy cleaning checklist helps UK tenants clean their rental property to the standard required to recover their full deposit. According to Tenancy Deposit Scheme (TDS) data, cleaning is involved in over half of all deposit disputes, making it the single biggest cause of deductions. This guide walks through exactly what needs doing in every room, in the order inventory clerks actually check it, and what you're genuinely required to do under UK tenancy law.
The Checklist at a Glance
- Cleaning is involved in over half of all TDS deposit disputes and around 29% of Deposit Protection Service (DPS) claims — the leading cause of deposit deductions in the UK.
- The required standard is matching your check-in inventory condition, not making the property look brand new — but this bar is often higher than everyday cleaning habits achieve.
- Kitchens and bathrooms receive the most scrutiny, with grease, appliance interiors, limescale, and mould the most common specific deduction triggers.
- Under the Tenant Fees Act 2019, a landlord cannot demand a "professional standard" clean unless that was the documented condition at check-in — the check-in inventory, not a generic professional benchmark, is always the true bar.
Why cleaning causes so many deposit disputes
Cleaning is involved in over half of all TDS deposit disputes and around 29% of Deposit Protection Service (DPS) claims, making it the leading cause of deposit deductions in the UK.
Key reasons tenants lose money:
- The required standard is matching your check-in inventory condition, not making the property look brand new, but this bar is often higher than everyday cleaning habits achieve
- Kitchens and bathrooms receive the most scrutiny
- The most common specific deduction triggers are: grease, appliance interiors, limescale, and mould
- Inventory clerks check inside cupboards, behind appliances, on top of doors, and inside ovens, areas that are routinely missed in a rushed clean
For the fuller statistical picture, including how this has changed year on year, our guide to why cleaning causes so many deposit disputes covers the underlying DPS and TDS data in more depth.
Kitchen: where deposit deductions happen most often
The kitchen receives more scrutiny than any other room and is the single biggest source of cleaning-related deposit deductions. Start here, while your energy and attention are freshest.
Oven and extractor fan
- Pull the oven out from the wall entirely, grease, dust, and debris accumulate behind and underneath for the full length of a tenancy, and this is exactly what an inventory clerk checks
- Degrease the oven interior thoroughly, racks, door glass (inside and out), and the grill pan all collect build-up that a surface wipe will not shift
- Remove and clean or replace extractor fan filters, grease build-up here is immediately obvious to anyone inspecting
Fridge and freezer
- Pull the fridge out from the wall and clean behind and underneath it
- Defrost the freezer if applicable, and clean the interior thoroughly, including shelves and drawers
Cupboards and worktops
- Clean inside and outside all cupboards, including shelves
- Clean the often-overlooked space underneath the sink, check for damp, mould, or residue
- Degrease worktops thoroughly rather than spray-and-wipe
- Wipe down kickboards along the bottom of units, dust and grime collect here throughout a tenancy and it is a spot inventory clerks specifically know to check
Bathroom: limescale, mould, and the seals nobody thinks about
Bathrooms are the second major source of cleaning disputes. The issues are consistent: limescale, mould, and soap scum, particularly around grout lines and silicone seals. These build up gradually, which is precisely why they catch tenants out at check-out.
Taps, showerheads, and glass
- Descale taps, showerheads, and any glass shower screens thoroughly
- Limescale is one of the most visually obvious signs of neglect to an inspector, even if the rest of the bathroom appears clean
- Clean mirrors and glass to a streak-free finish, smears are immediately obvious under bathroom lighting
Tiles, grout, and silicone seals
- Clean grout lines between tiles with a grout brush, not a general wipe-down
- Treat any mould on silicone seals around the bath or shower specifically, black mould reads as a serious neglect signal during an inspection
Easy-to-miss areas
- Clean the toilet base and behind it
- Clean extractor fan covers
- Wipe inside any bathroom cabinets or cupboards
Living areas and bedrooms: the details that get skipped
Living rooms and bedrooms carry genuine deduction risk when specific details are missed. These rooms feel lower-stakes than kitchens and bathrooms, but inspectors still check them methodically.
Surfaces and fixtures
- Wipe skirting boards throughout, dust and scuff marks accumulate here over months and are an easy, visible check for any inspector
- Clean light switches and plug sockets in every room, these are high-touch points that accumulate a surprising amount of grime
- Wipe window sills, frames, and the tops of doors, these are rarely at eye level during everyday living, which is exactly why a thorough inventory check catches them
Flooring
- Vacuum or mop all carpets and flooring thoroughly, including under furniture where it is practical to move
- Treat any visible carpet stains specifically rather than hoping they go unnoticed, flooring condition is one of the more visually obvious things any inspector assesses on entering a room
Windows: inside, outside, and the frames in between
Streaky or grimy glass is immediately noticeable and disproportionately affects how clean an entire room looks, even if everything else has been done correctly.
- Clean glass inside thoroughly to a streak-free finish
- Where reasonably accessible, clean the outside too, ground-floor and easily reachable windows are fair game for an inspector's assessment
- Wipe down frames, tracks, and sills, dust and grime collect here and are easy to miss if you focus only on the glass
Hallways, entrances, and connecting corridors
Hallways are transitional spaces that are easy to overlook, but they are often the first and last areas an inventory clerk sees during an inspection.
- Clean skirting boards, light switches, and floors to the same standard as any other room
- Clear out and clean inside any storage cupboards along hallways, including under-stairs storage, these are easy to treat as dumping grounds and equally easy for an inventory clerk to open and check
Appliances and fixtures included in the tenancy
Any appliances included in the tenancy, beyond built-in kitchen appliances, need their own specific attention.
Washing machine
- Clean door seals thoroughly, mould accumulates here and is worth treating directly
- Pull out the detergent drawer fully and clean behind it, not just the visible front, this is a commonly missed spot that accumulates significant residue and is specifically checked in a proper inventory review
Dishwasher
- Clean door seals and wipe inside, including the filter at the base
Tumble dryer
- Clean the lint filter and wipe inside the drum
What "fair wear and tear" actually covers
Fair wear and tear covers the gradual, unavoidable deterioration that comes from normal use, slightly worn carpet in high-traffic areas, minor fading from sunlight, or general softening of a paint finish over a long tenancy. Tenants are not responsible for cosmetic ageing of this kind.
What fair wear and tear does not cover:
- Built-up grease that was never cleaned
- Mould that developed from inadequate ventilation or cleaning over time
- Genuinely dirty surfaces that a normal cleaning routine would have kept in check
Understanding this distinction helps you focus effort on real cleaning tasks, rather than worrying unnecessarily about cosmetic ageing that is not your responsibility to fix.
How to plan a realistic cleaning timeline
A genuinely thorough end of tenancy clean takes considerably longer than most people budget for.
| Property size | Estimated time (DIY) |
|---|---|
| One-bedroom flat | Half a day (approx. 4–5 hours) |
| Two-bedroom flat | Full day (approx. 6–8 hours) |
| Three to four-bedroom house | Full day or more |
Given how much moving day already involves, packing, final meter readings, key handovers, and often a new property to deal with simultaneously, it is worth being honest early about whether a DIY clean to this standard is realistic within your available time. If you'd rather hand this over, our Birmingham end of tenancy cleaning team can work to exactly this checklist on your behalf.
The right order to clean each room
Rather than jumping between rooms and losing track of what is done, work through the property in a consistent order: top to bottom, back to front within each room.
Within each room, work in this sequence:
- Ceilings and light fittings (dust falls downward, cleaning these last would undo earlier work)
- Walls and any marks
- Windows and frames
- Surfaces and fixtures
- Floors last
Order for rooms across the property:
- Kitchen first, most scrutiny, requires the most time and effort
- Bathroom second
- Living areas and bedrooms
- Hallways and storage
How to photograph your clean as evidence
Taking dated photographs throughout the cleaning process is one of the simplest things you can do to protect yourself if a dispute arises later.
- Take clear, well-lit photos on your phone, room by room, once each area is finished
- Save them somewhere they will not get lost
- Photograph specific areas most likely to be disputed: oven interior, bathroom seals, behind appliances, inside cupboards
Photographic evidence taken on the day carries considerably more weight with an independent adjudicator than anything reconstructed from memory weeks later during an active dispute. This habit matters even if you feel confident about the standard of your clean. If you want the fuller picture on what to do if a dispute happens anyway, see the full range of services we offer alongside this checklist.
Frequently asked questions
What does an end of tenancy clean need to include?
An end of tenancy clean needs to cover every room in the property to the standard recorded in your check-in inventory. This includes oven interiors, extractor fan filters, bathroom grout and seals, inside cupboards, behind appliances, skirting boards, light switches, and all flooring. It goes well beyond a standard domestic clean.
Do I need to clean behind appliances even if I never moved them during my tenancy?
Yes. Inventory clerks specifically check behind and underneath major appliances like ovens and fridges, and grease or dust build-up here is one of the most common specific reasons for a kitchen-related cleaning deduction, regardless of whether the appliance was moved during the tenancy.
What is the difference between fair wear and tear and a cleaning issue?
Fair wear and tear covers gradual, unavoidable changes such as slightly worn carpet or minor fading. Cleaning issues cover things a proper routine would have prevented, built-up grease, limescale, or mould from inadequate cleaning rather than simply the passage of time.
How long does an end of tenancy clean take?
A thorough clean of a one-bedroom flat typically takes around half a day done properly. A three or four-bedroom house can take a full day or more. Most tenants underestimate this significantly when planning their move-out schedule.
Is it worth cleaning areas that were not noted as clean at check-in?
Generally, yes. While the legal standard is matching your check-in inventory, unclean areas, regardless of their exact starting condition, are the most common trigger for disputes. A genuinely thorough clean throughout remains the safest approach.
What are the most common reasons tenants lose part of their deposit for cleaning?
According to TDS and DPS data, the most common specific triggers are: dirty oven interiors, limescale on taps and showerheads, mould on bathroom seals, greasy extractor fans, and unclean areas behind or underneath appliances.